
Repairing a Tesla Model 3 seat belt buckle
Disclaimer (please read first)
This write‑up is shared for knowledge and informational purposes only. I take no responsibility for any damage caused to your vehicle, seat belt buckle, wiring, interior, yourself, or any other person or property if you attempt anything described here.
After going through this discovery process and completing the DIY myself, my actual recommendation is simple: just buy a replacement seat belt buckle assembly online and replace the whole unit. It’s safer, faster, and far less risky.
That said—knowledge is valuable. I couldn’t find detailed information like this anywhere online, and I learned a lot while troubleshooting and fixing this myself. That’s why I’m documenting it.
Quick side note: this kind of hands‑on problem solving mindset is the same reason I built ChargeXcelTM. ChargeXcel is a smart energy management system designed specifically for Tesla and EV owners, focused on visibility, control, and making better decisions around how your car interacts with your home energy system. If you’ve been waiting on an EV charging solution because the upgrade price didn’t make sense, this might be a good fit.
How this all started
One day my car threw a Safety Restraint System alert:
RCM_a094 – Safety restraint system issue
This usually points to a seat belt component problem. In my case, it turned out to be the rear middle seat belt buckle wiring. After digging into it, this seems to be a somewhat common issue—most likely caused by the way the buckle wiring sits under tension and is zip‑tied to the chassis from the factory.
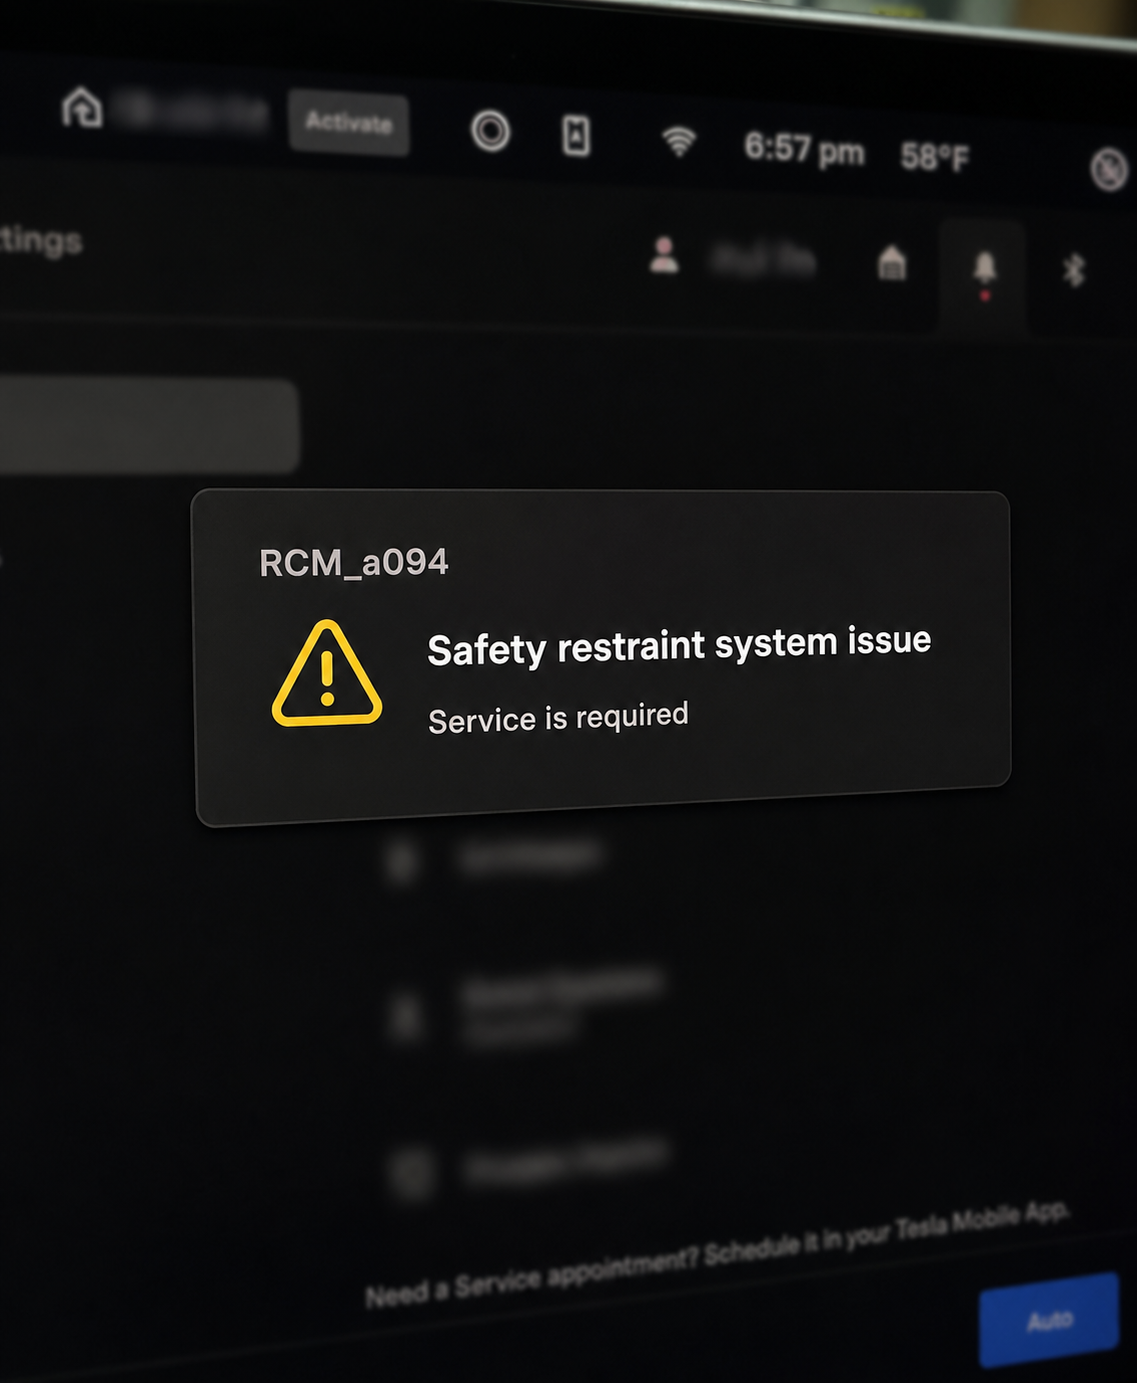
RCM_a094 Error
Confirming the problem in Service Mode
Before tearing anything apart, I wanted to be absolutely sure which buckle was failing.
Getting into Tesla Service Mode
From the center touchscreen:
1. Go to Controls (car icon) > Software
2. Press and hold the large MODEL text for ~2–4 seconds
3. Type service and confirm
You can exit later via: Controls > Service Mode > hold Exit for 2 seconds
Once in Service Mode, head into the Seats section. You can see live status for each buckle. In my case, I had to gently wiggle the wiring for the error to appear.
Service Mode finally gave me the smoking gun:
VCRIGHT_a292_buckleFaultedRearCThe rear center seat buckle sensor is faulted
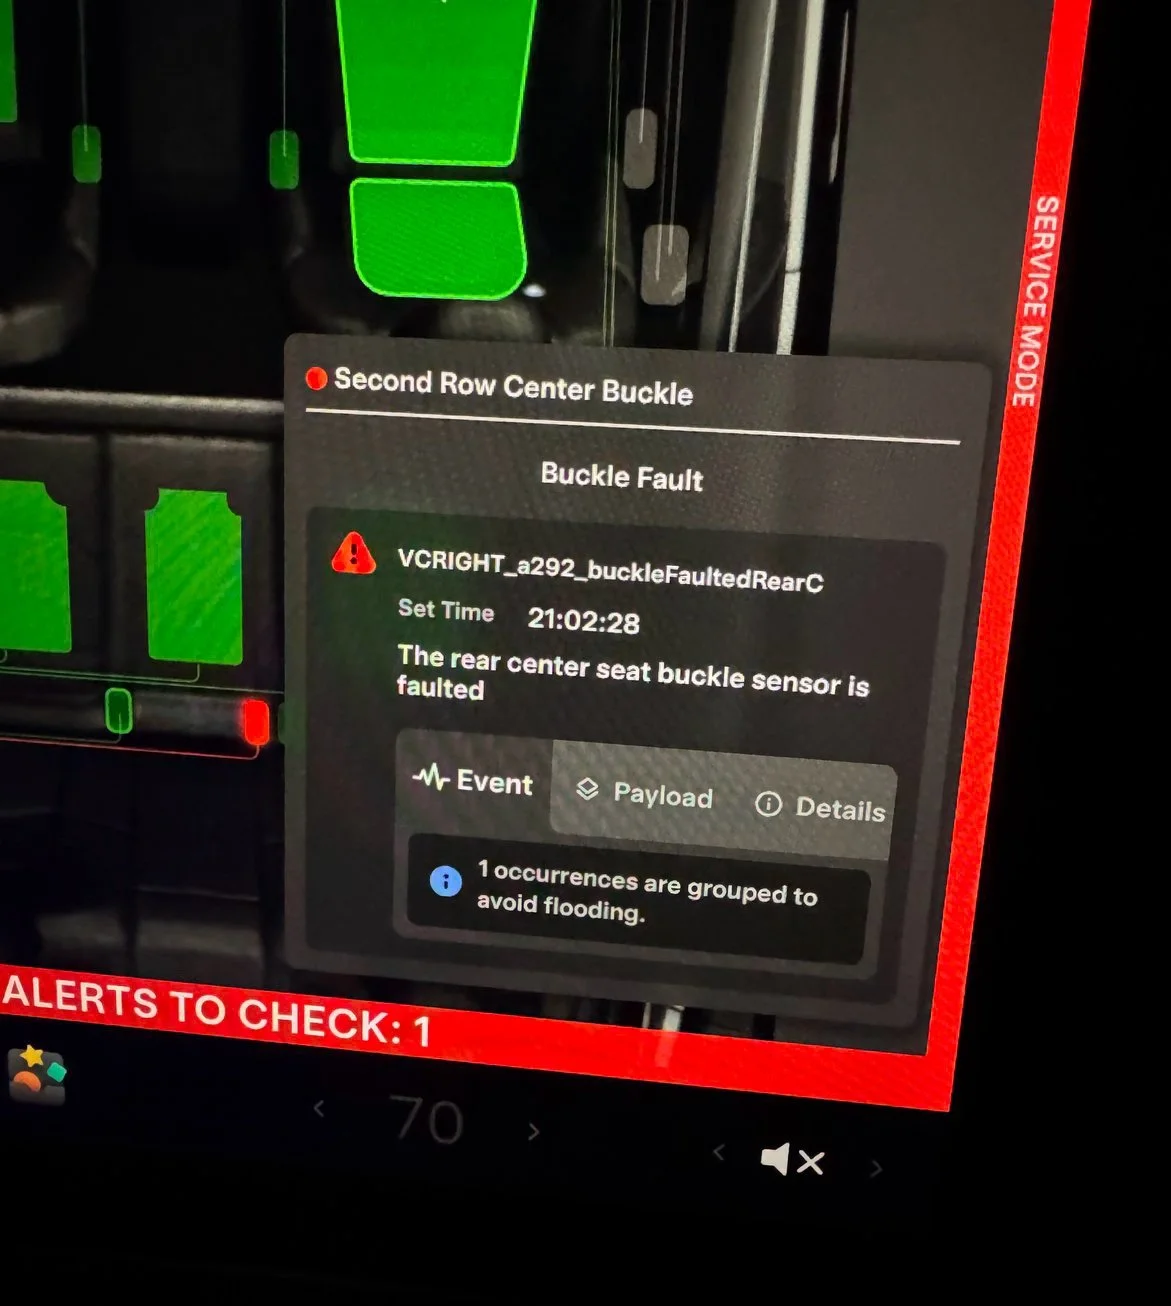
Now I knew exactly what I was dealing with.
Getting access to the buckle
Removing the rear seat
This part is surprisingly easy. Tesla’s official service manual covers it well, and there are plenty of YouTube videos if you prefer visuals.
Tesla manual: https://service\.tesla\.com/docs/Model3/ServiceManual/en\-us/GUID\-30CF51D6\-0EA2\-4E8B\-B915\-2AF7156E608B\.html
Once the rear seat is out, you can access the center seat belt buckle.
Removing the center seat belt buckle
Tesla’s instructions for removing the buckle itself: https://service\.tesla\.com/docs/Model3/ServiceManual/2024/en\-us/GUID\-2C8134A2\-B4E4\-4A17\-9000\-8B57DC78ADD2\.html
Important note about the bolt:
· The bolt is installed with thread locker
· It is very difficult to loosen
· Tesla recommends heat
· I didn’t use heat—instead I used a long extension (about a 3‑foot PVC pipe) over the wrench
For the first 15+ quarter‑turns it honestly felt like nothing was happening. Eventually, it does break free.
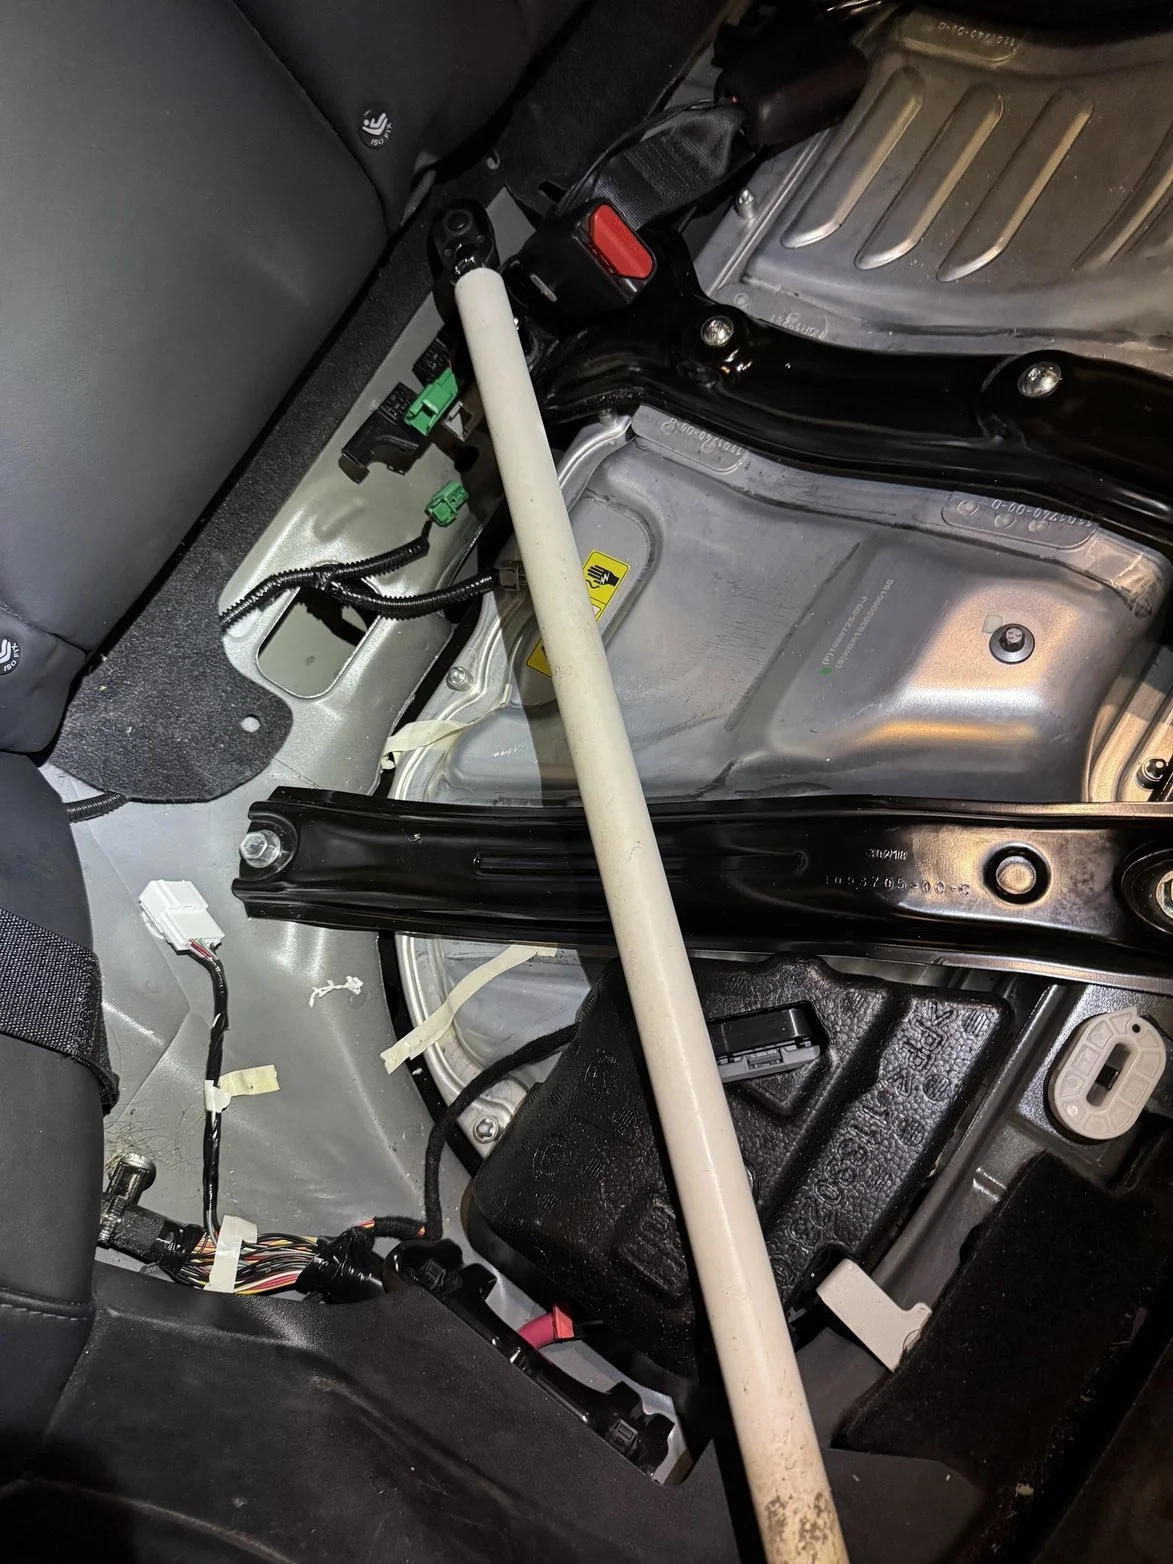
Using PVC pipe for extra leverage
Opening the buckle assembly
Once the buckle is out:
· The right and center buckles are glued together
· The buckle housing itself opens with two hex screws
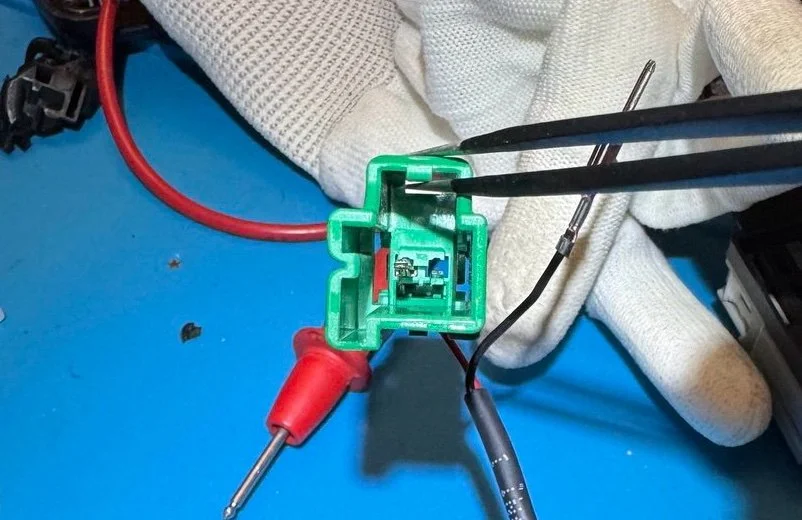
Inside, the sensor wiring assembly can be separated from the mechanical buckle portion. A small flat‑head screwdriver works—gently pry it straight off sideways.
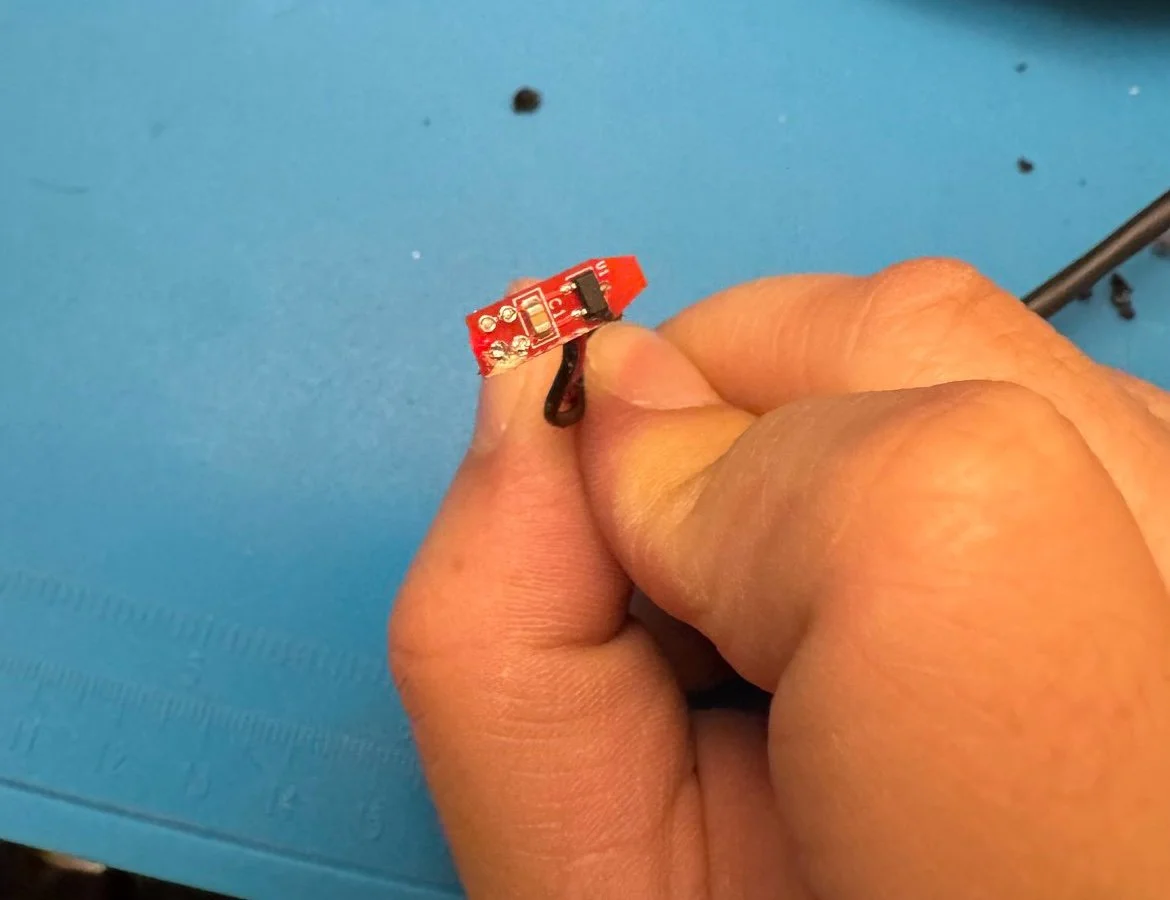
The sensor and circuit board
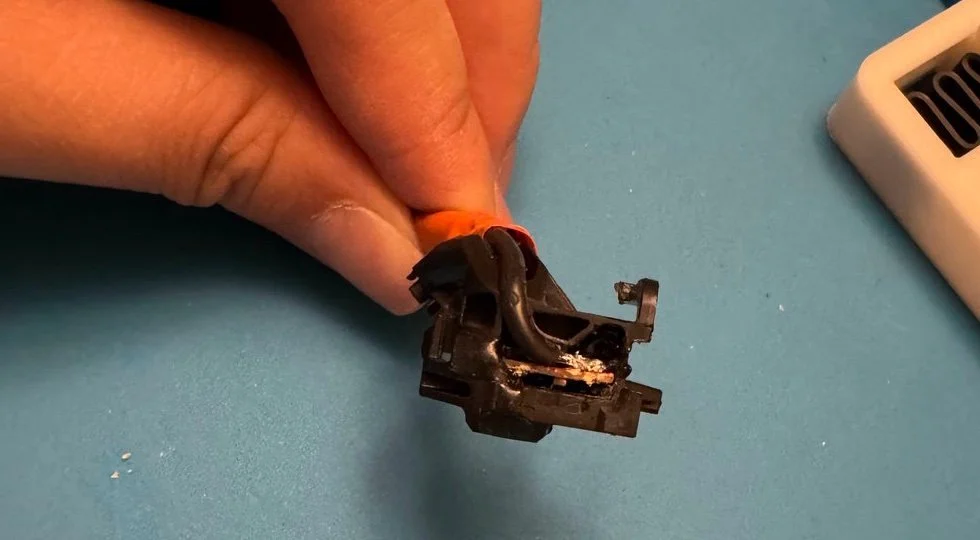
I forgot to take photos while opening it, but the sensor assembly is embedded in a soft black rubber‑like material.
At first, I used pliers to painfully pick it off bit by bit—this took forever. Only later did I realize a heat gun melts it easily. If you’re doing this, just use heat from the start.
Circuit board inside housing
Underside of the circuit board
Top side were wires are soldered
Once exposed, there’s a small circuit board inside.
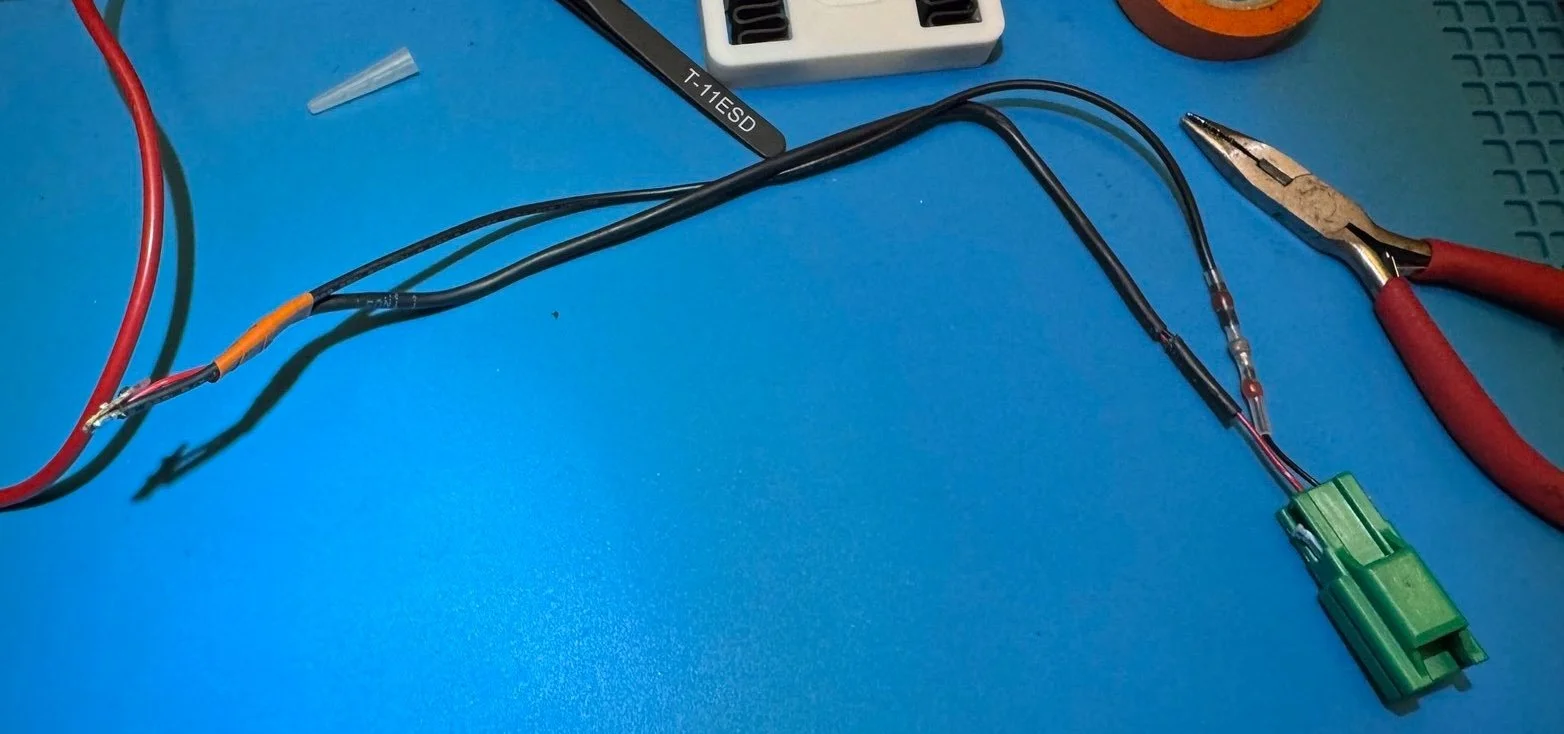
Finding the broken wire
If the damage isn’t obvious, grab a multimeter.
· Put one probe between the two wires on the circuit board
· This makes testing the connector pins easier
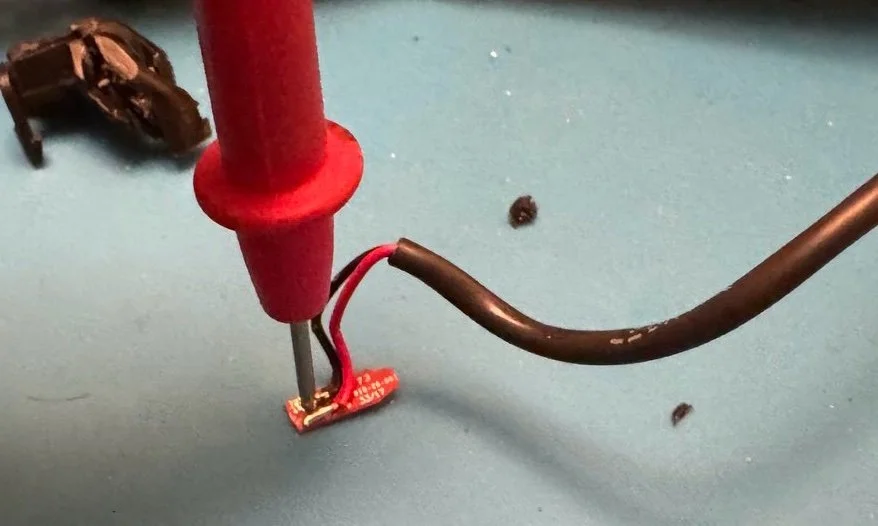
Then check each pin on the connector end.
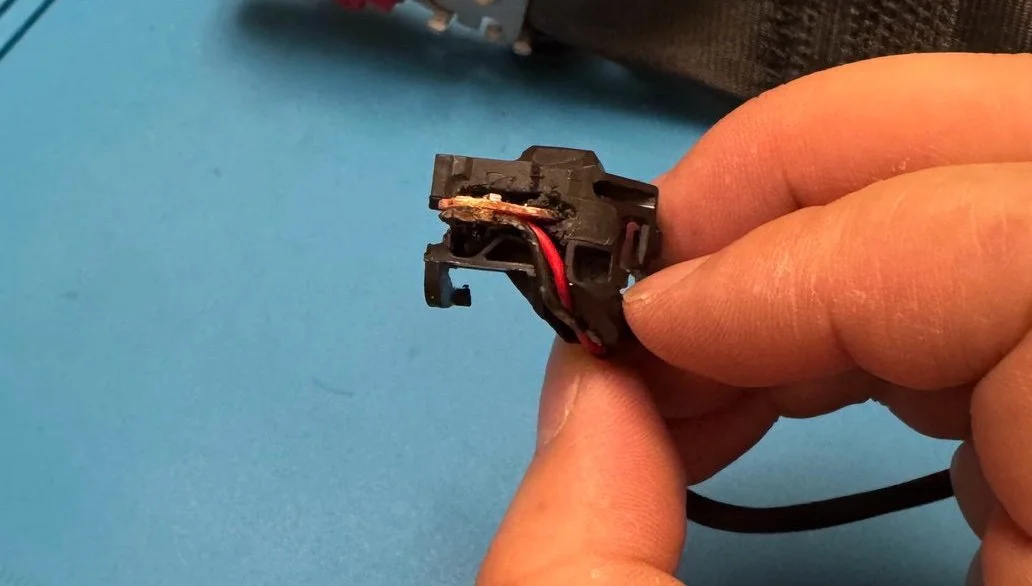
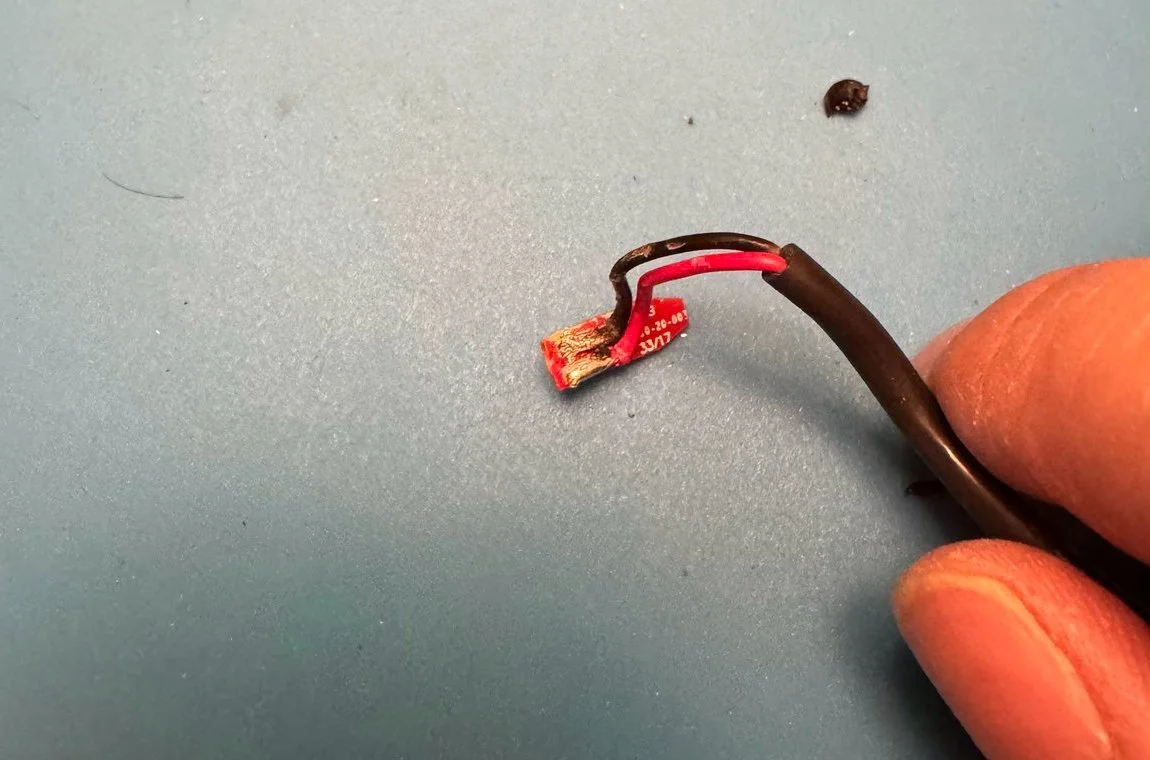
In my case, the black wire was no longer conducting.
A mistake worth calling out
I initially thought:
“I’ll just remove the pin, clamp a new wire in, and be done.”
Bad idea. Don’t do this.
The pin is extremely small and precisely crimped. You can remove it by pushing back the white plastic and releasing a tiny clip—but unclamping it without damaging it is nearly impossible.
removed the pin for the black wire, unnecessary.
I damaged the pin for no good reason.
Much better approach:
· Leave the pin alone
· Cut the bad wire just below the pin
· Leave enough length for soldering
The actual repair plan
The fix was simple:
· Solder a new black wire to:
o The circuit board
o The existing pin (without removing it)
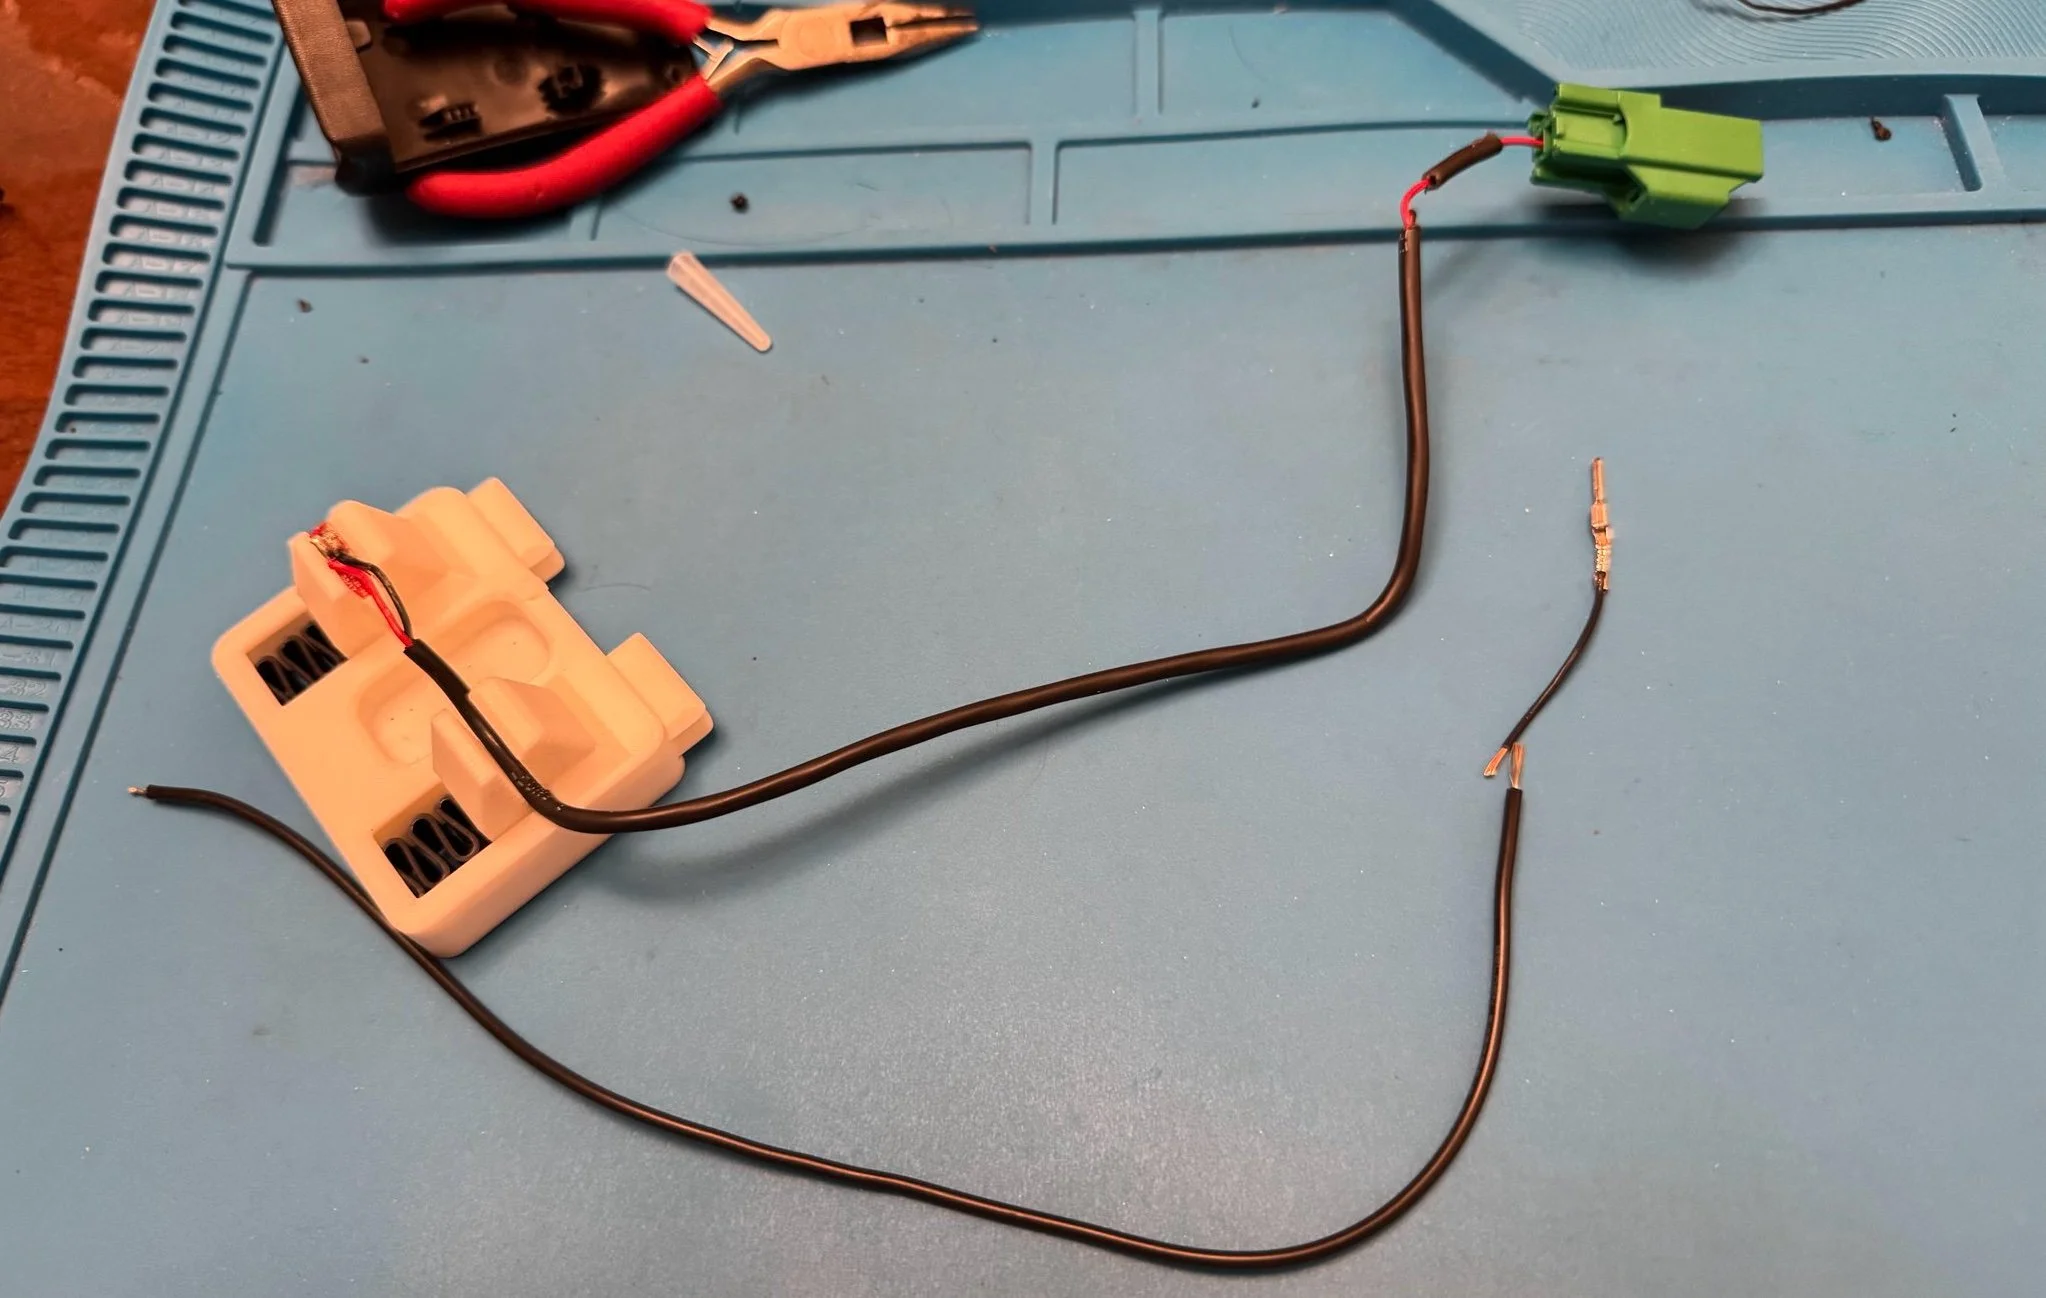
Repair plan, solder the 2 ends
Soldering tips
· Ensure the red and black contacts do not touch
· Test continuity with a multimeter after soldering
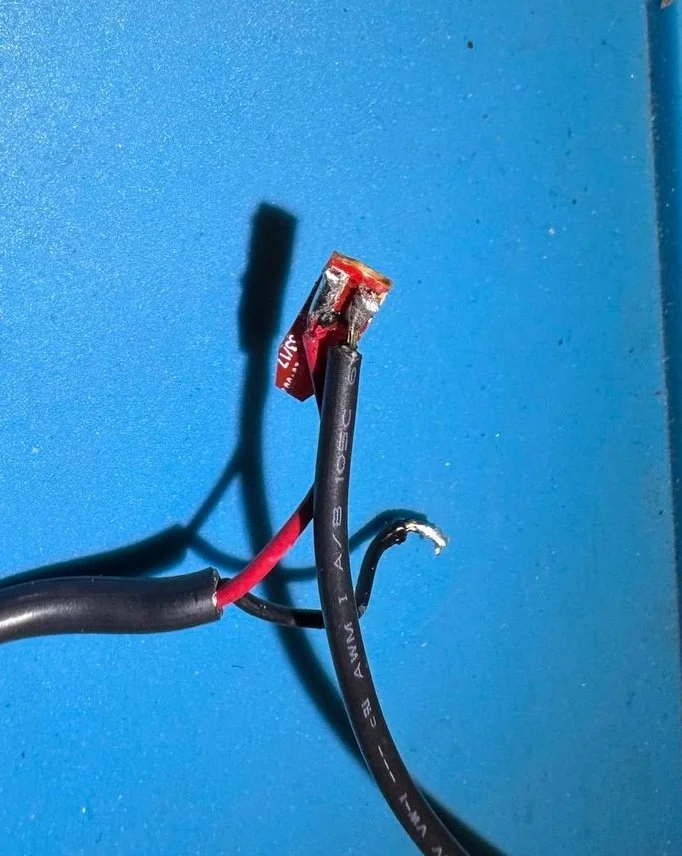
New Blackwire soldered onto the circuit board
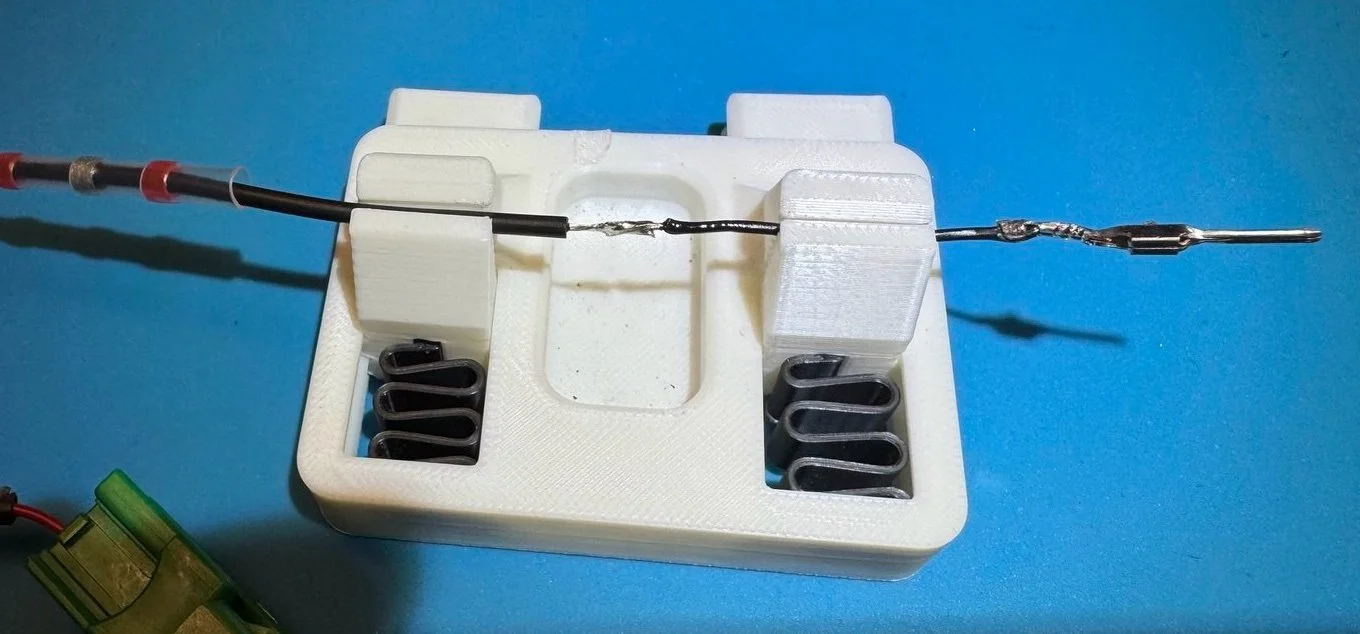
Here’s the pin connection after soldering—notice the damage I caused earlier by trying to uncrimp it. Totally avoidable.
Once everything is connected, test again end‑to‑end.
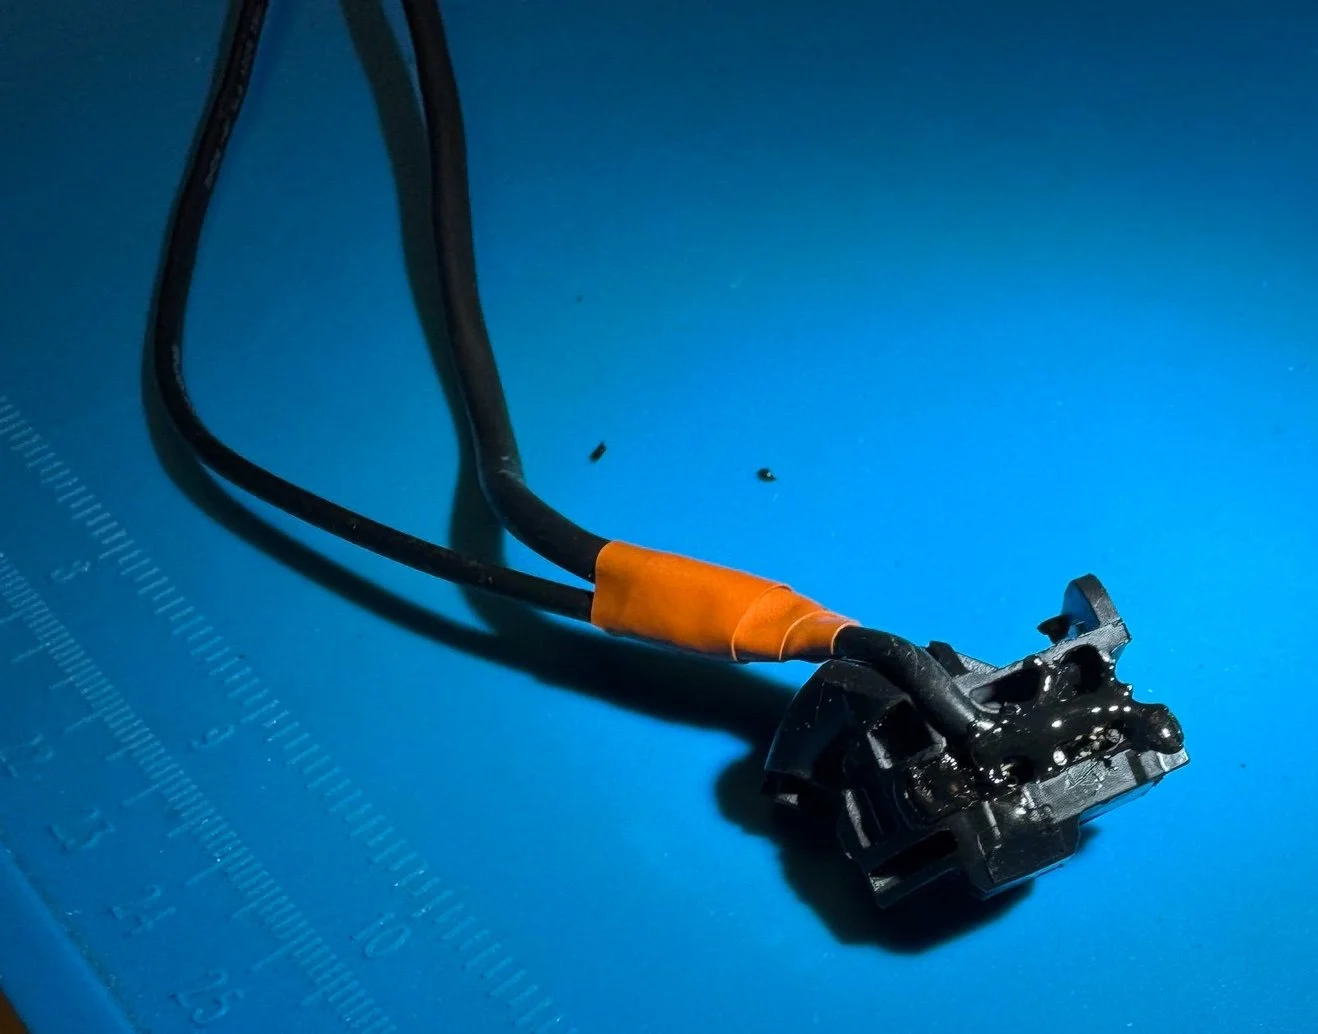
shrink wrapped the wire repair
Sealing it back up
· Reinsert the circuit board into the sensor housing
· Use a heat gun to re‑melt the black rubber material
· I tossed too much of the black rubber material earlier, so I filled the remaining space with super glue
Use heat gun to soften rubber material for easier insert
melt more rubber material to seal circuit board
Reassembly
I zip‑tied the two wires together tightly in several places to reduce tension on the repaired section.
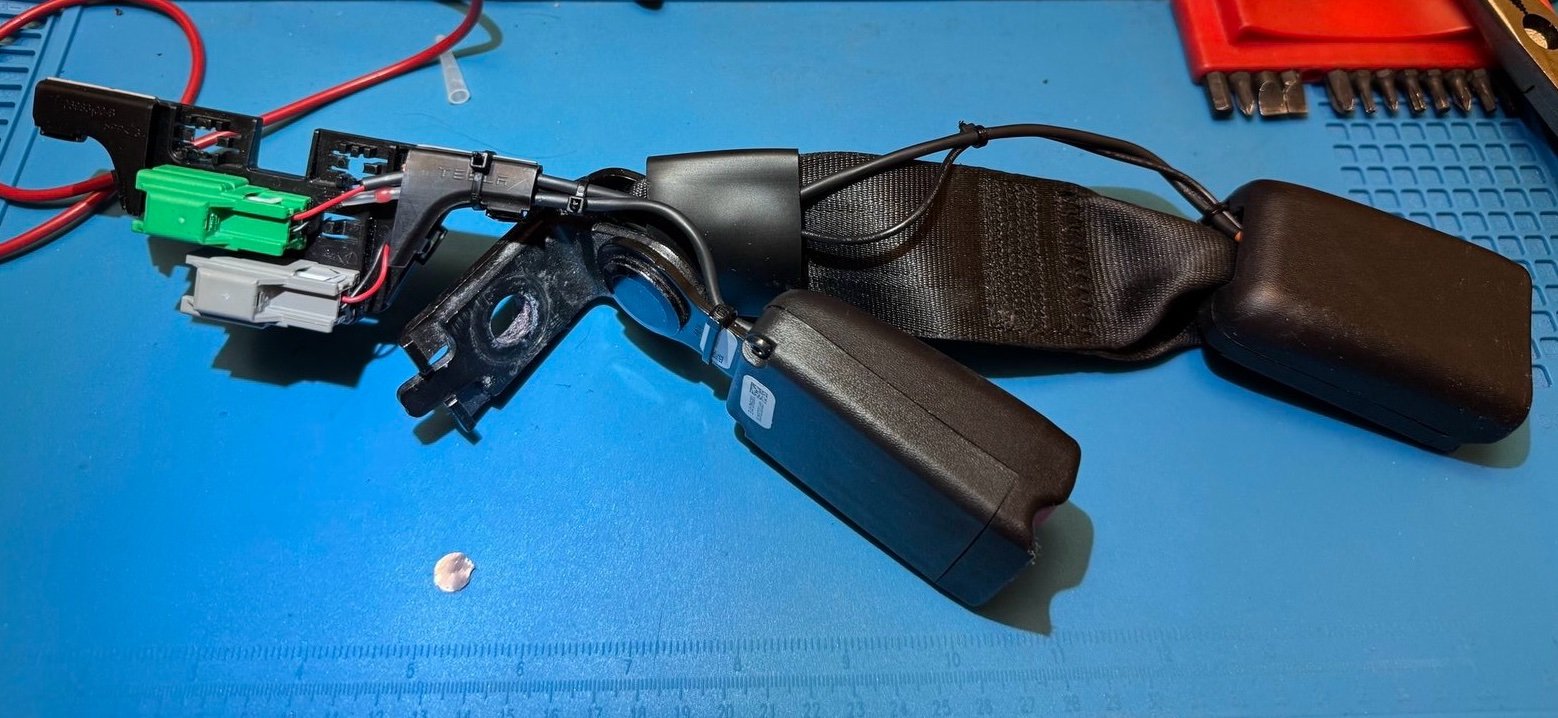
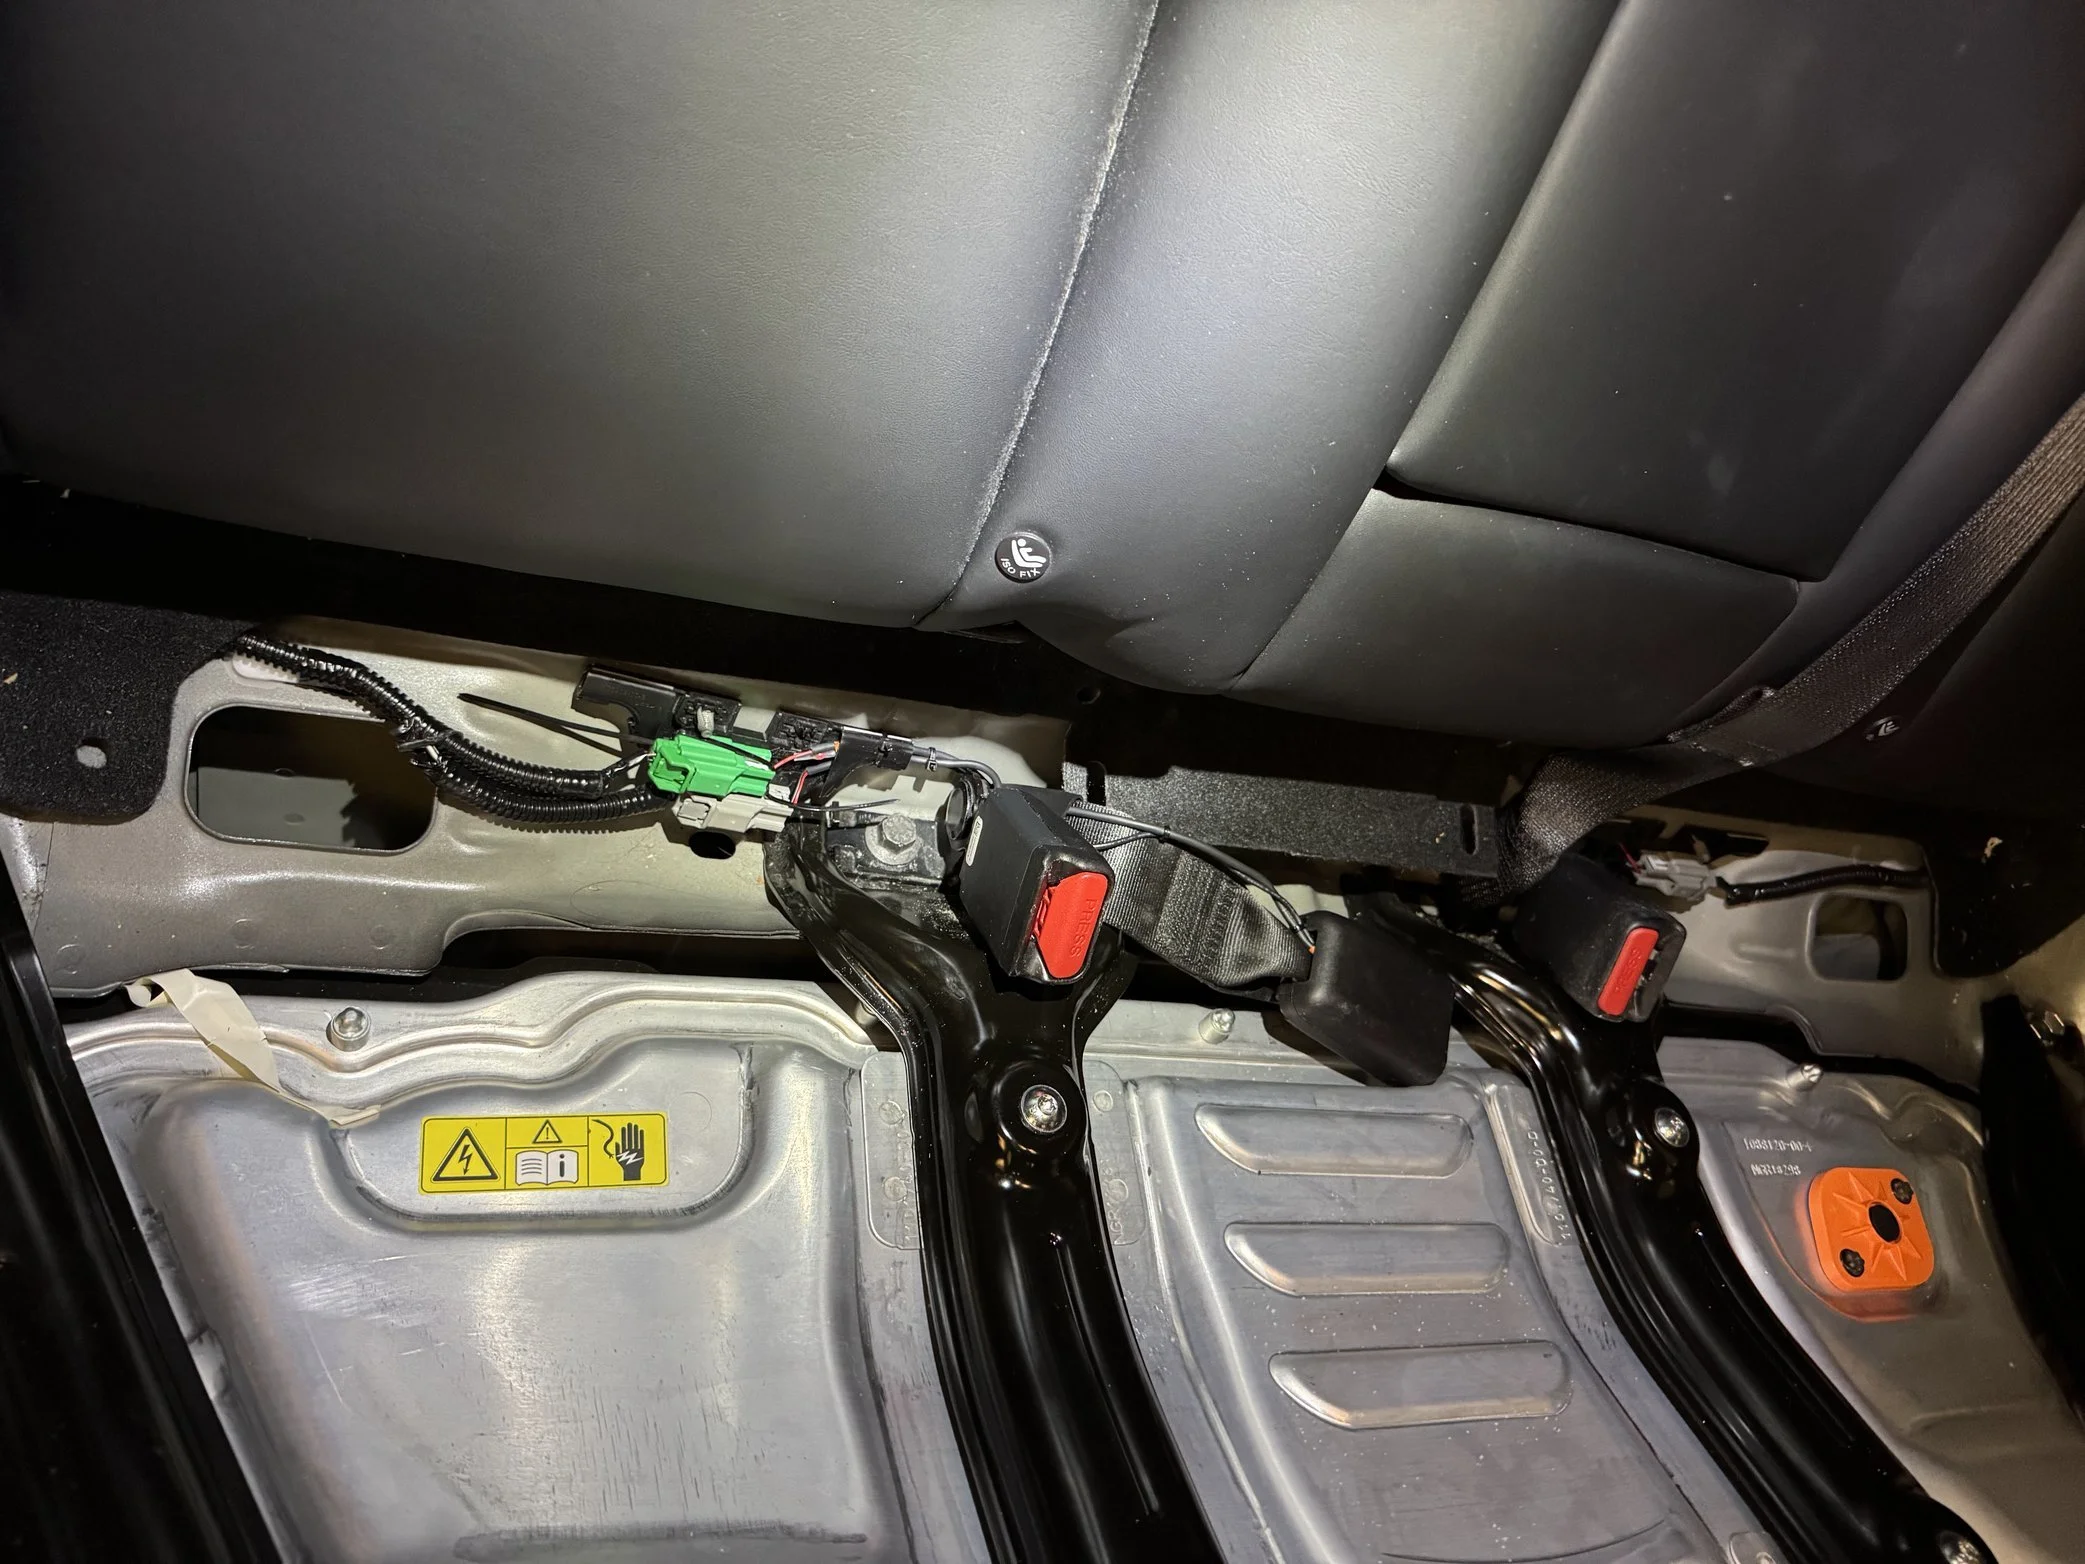
entire assembly after repair
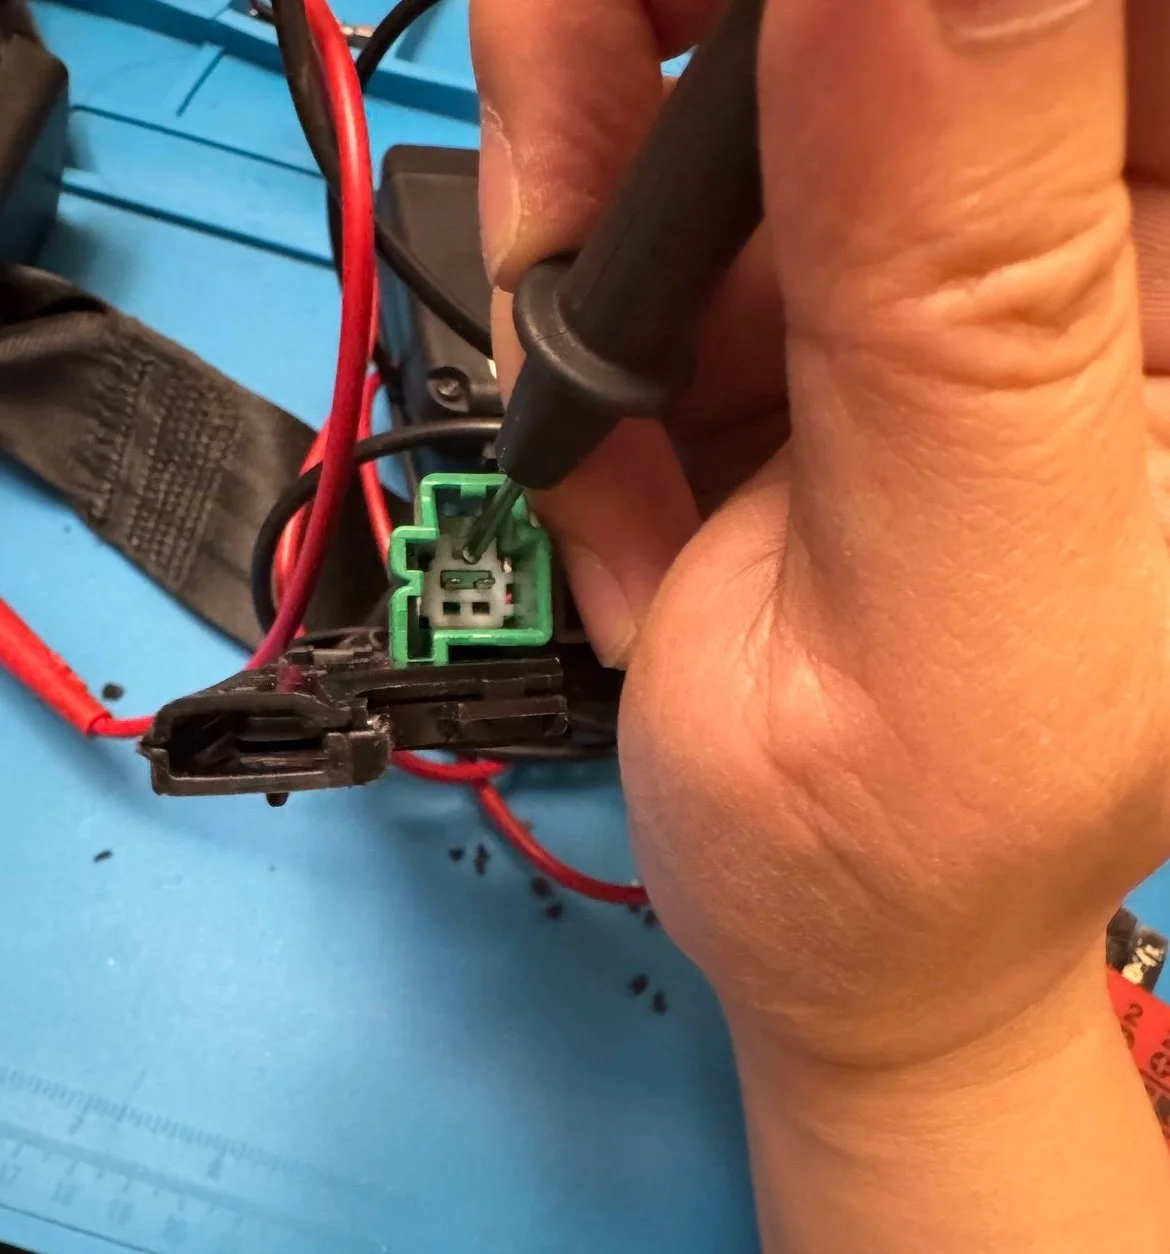
Then reinstall everything in reverse order:
· Reinstall buckle assembly
· Torque the bolt (again, extra leverage helps)
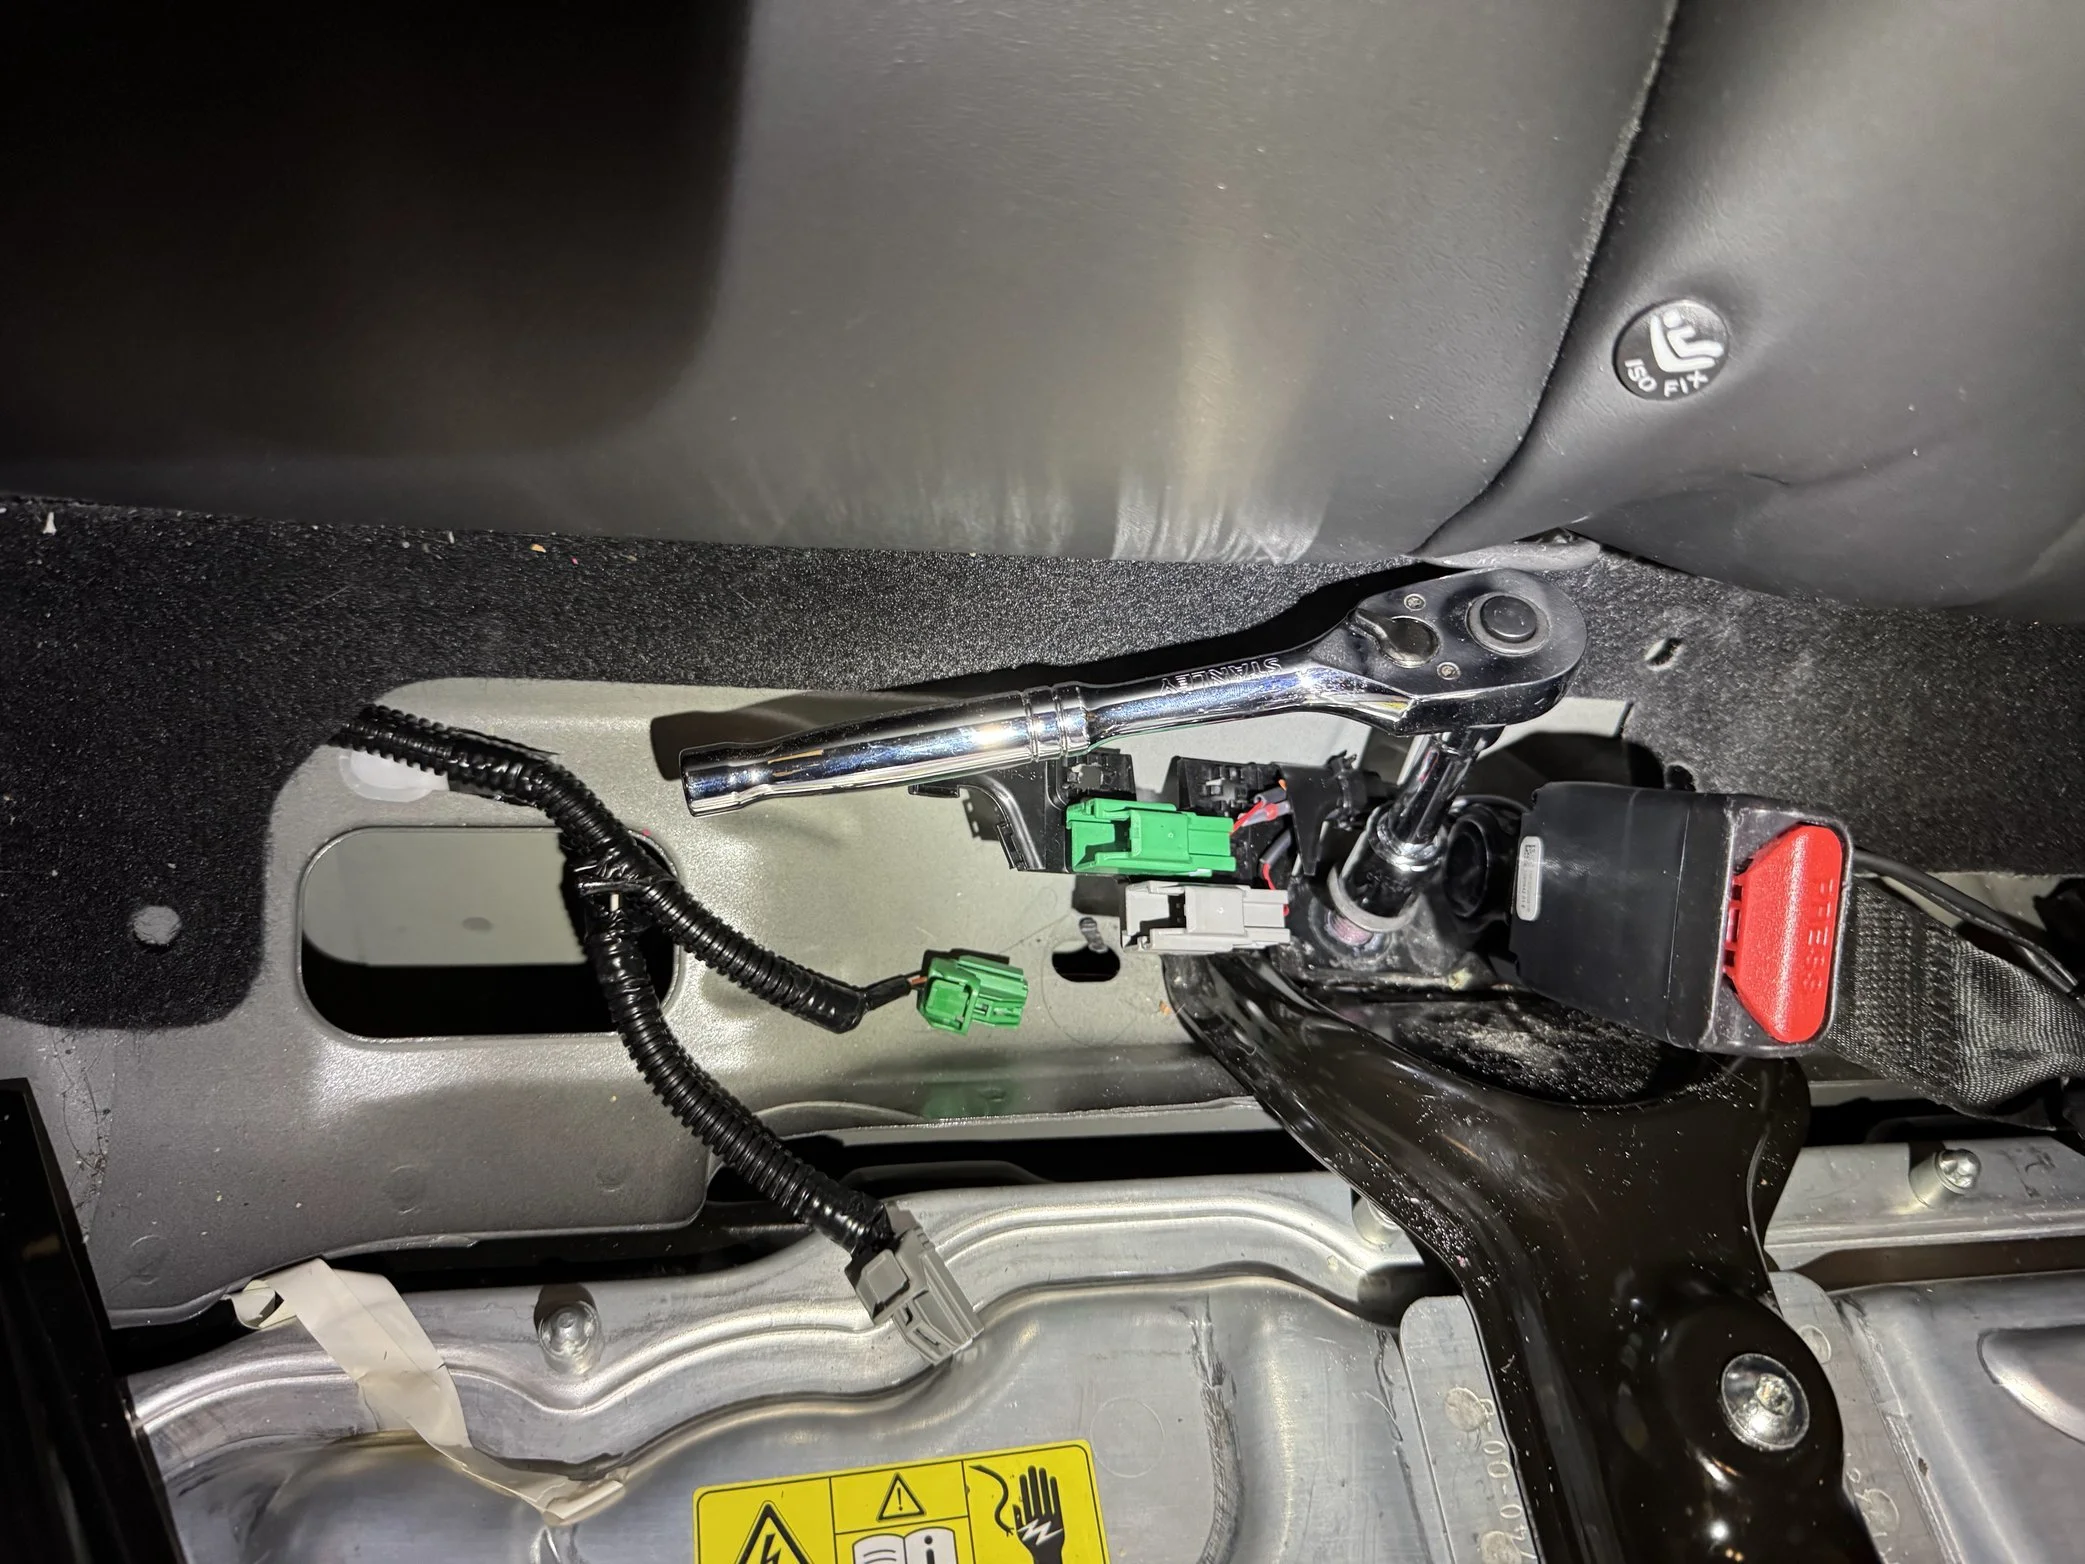
Start with the wrench

Torque with PVC pipe
re-connect the green and grey clips
Final test
Back into Service Mode one last time—and finally, everything looks normal again.

Seat belt system all green after testing by seating on it, and buckle in
Final thoughts
Would I do this again?
Honestly—probably not. The time, precision work, and risk involved just isn’t worth it compared to buying a replacement buckle assembly.
But now the information exists. If this helps you understand what’s going on, or helps you decide not to do the repair yourself, then it served its purpose.
- Herrick
Here’s a Video walk through